Hexo Server Deployment With Gitlab

What you’ll need to follow this guide: Link to heading
- GitLab Repo with pipelines enabled
- Superuser account on server (this guide is written for Ubuntu but other distributions should still be very similar)
- SSH enabled on destination server
- A running webserver (we’ll assume NGINX is running here)
- A Hexo website you wish to deploy
- (optional) an SSL Certificate for use with your site or LetsEncrypt setup knowledge
Concept: Link to heading
A few weeks back, I was looking for an easy-to-use framework for blogging. Hexo was highly recommended and I thought I’d give it a try. What I think of Hexo will be covered in a separate post.
In this guide, I will be using GitLab Pipelines to deploy a Hexo site to a server that I control.
Benefits: Link to heading
- No-fuss automated deployment – just update your master branch and let pipelines handle the rest
Costs: Link to heading
- GitLab Pipelines - Free
- Server hosting costs apply
Implementation Guide: Link to heading
I’m going to assume you have a Hexo site by now since that is not covered in this guide. Link to heading
1. Create a user on your server for deployment. Link to heading
We’re going to set up some pre-requisites on the server-side, starting with setting up a deployment user account aptly named ‘deploy’:
sudo adduser --gecos --disabled-password deploy
(Optional) you can skip the password part, we’ll be using SSH trust with a keypair for this guide
This user is what we will use to connect to your server hosting Hexo. Link to heading
2. Change to deploy user home directory: Link to heading
sudo su - deploy
3. Set up a keypair for the deploy user: Link to heading
ssh-keygen -t rsa -b 4096
Call this key what you want, we will use the ssh-keygen defaults for this guide in the default locations
This should net you two files: ~/.ssh/id_rsa and ~/.ssh/id_rsa.pub
Link to heading
The private key id_rsa should be kept secret, for most part, and the public key id_rsa.pub will be added to your server to allow SSH trust in the next step.
4. Modify your server’s SSH authorized_keys: Link to heading
- create the authorized_keys file in the deploy user’s ‘.ssh/’ directory if it doesn’t exist:
touch ~/.ssh/authorized_keys - put the public key created in step 3 into the authorized_keys file:
echo ~/.ssh/id_rsa.pub >> ~/.ssh/authorized_keys
Now anything using the id_rsa.pub private key will be able to connect to your server via SSH (rsync uses SSH) as the deploy user.
Link to heading
5. Add the deploy user private key to your repo: Link to heading
Save the private key of the deploy user from ~/.ssh/id_rsa into the root directory of your repository, we will call this key hexo_deploy.pem for this guide.
This key will be checked aganinst the public key that was added to authorized_keys in the previous step.
Link to heading
As mentioned earlier, the private key should be kept secret for the most part. Don’t check this into a publically-visible repository.
6. Create an ssh_config file that will later be used by the pipelines docker container:
Link to heading
This config is a helper to ensure that the right key is used when calling the specified host
Link to heading
You’ll want to add your proper hostname here of course.
7. Install the hexo rysnc type deployer in your project directory: Link to heading
npm install hexo-deployer-rsync --save
This NPM package will allow rsync operations to be performed as part of your Hexo installation. Link to heading
8. Edit the Hexo project _config.yml file and enable rsync type deployment:
Link to heading
Now you should be able to use rsync to deploy to your server from your Hexo installation. Link to heading
As with other steps, do ensure you set the correct hostname for your server. Additionally set the proper root directory of where your static files live and will be served by NGINX.
9. Change ownership of your webroot to deployment user: Link to heading
Lastly on the server, change ownership of your webroot directory, let’s assume that is /var/www/html to match with the above Hexo deployment config.
- exit out of the deploy user’ shell with
exit(as your deploy user shouldn’t have sudo) - change permissions on your webroot:
sudo chown -R deploy.deploy /var/www/html
Your nginx.conf may look something similar to this:
This is a basic NGINX config that will redirect non-http requests to an https listener on port 443. This example also uses LetsEncrypt for SSL Certificates but you are certainly welcome to use your own. Link to heading
You will want to ensure that server_name matches your website domain.
10. Set up GitLab Pipeline: Link to heading
To start with GitLab Pipelines, create a .gitlab-ci.yml file in your repository with your preferred editor:
_This gilab-ci.yml example uses a basic npm 10x image on DockerHub with Hexo and rsync installed but you can choose your own image, of course. Link to heading
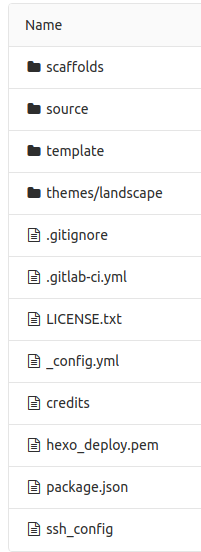
By now your repository root should look something like this:
11. Commit your changes to the master branch git push origin master and it should trigger the following sequence of events:
Link to heading
  a. check out the specified docker image `crungruang/hexo-deploy:latest`

  b. add your private key and ssh_config to docker container

  c. install hexo-cli

  d. run some basic tests and install necessary npm modules

  e. generate static files for your site

  f. deploy your site according to the Hexo `_config.yml` _deploy_ stanza
Conclusion Link to heading
If you were able to follow along and make the necessary modifications according to your situation, you should have a working auto CI/CD in Gitlab with your Hexo installation.
Considerations Link to heading
- Typically one does not commit private keys into a repo, it isn’t the best of practices outside of personal blog use but this is just one of many ways of working with your blog
- There are certainly other deploy methods that Hexo provides, you should see what is best for you – many choose (wisely) something like S3 – I just happen to have a spare server or two or three to play with..